Ultrasound Inspection of Large Diameter Seamless Steel Pipe
Ultrasound Inspection of Large Diameter Seamless Steel Pipe
Non-destructive testing of seamless steel pipe is an important means to ensure product quality.
During the production of seamless steel tube, various defects may occur, which may affect the quality of steel tube. In order to ensure the safety of the products, the relevant state departments require the production enterprises to inspect seamless steel tubes in accordance with the product standards. Nondestructive testing mainly includes five methods: ultrasonic testing, ray testing, eddy current testing, magnetic particle testing and penetration testing. As an effective testing method, ultrasonic testing has been widely used in the field of seamless steel tube testing. Compared with other non-destructive testing methods, ultrasonic testing has many advantages, such as wide range of tested objects, large detection depth, accurate defect location, high detection sensitivity, low cost, good overwork performance, fast speed and harmless to human body.
It can be seen that ultrasonic nondestructive testing is a very important method in the field of nondestructive testing. It is of great significance to ensure the quality and reliability of seamless steel tube products.
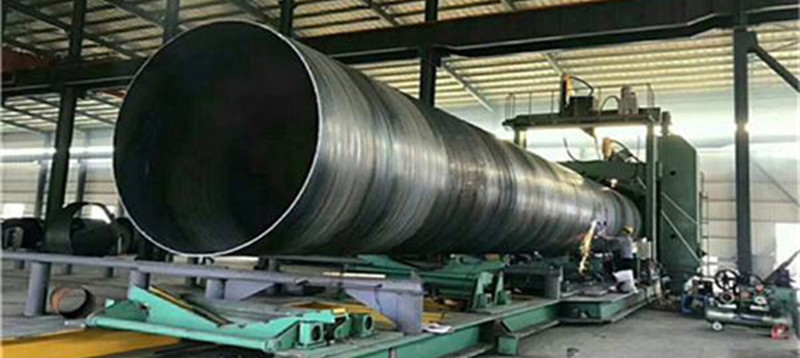
1. Principle and method of detection
1.1 Detection Principle
In homogeneous materials, the existence of defects will cause discontinuity of materials. This discontinuity often results in inconsistency of acoustic impedance. Ultrasound will reflect at the interface of two kinds of media with different acoustic impedance. The reflected energy is related to the difference of acoustic impedance between the two sides of the interface and the quantity orientation and size of the interface. This is the principle of ultrasonic flaw detection.
1.2 mode of flaw detection
According to the movement mode of the tested steel pipe and the ultrasonic probe, there are two main types of automatic ultrasonic flaw detection equipment for seamless steel pipe in China: one is the device that the steel pipe spirally advances and the probe does not move; the other is the device that the steel pipe moves in a straight line and the probe rotates at a high speed. Whatever the movement mode, it is necessary to ensure that the whole section area of the steel pipe to be explored is scanned to be closed.
This system adopts the method of water immersion detection, the method of ultrasonic immersion focusing scanning to detect the longitudinal and transverse defects, wall thickness and layer defects of the inner and outer walls of O168-0730mm stainless seamless steel tube, and automatically detects the detected defects. Marking.
The probe assembly contacts the steel pipe through wear-resistant contact shoes. In this way, a rotating head is needed to fix each probe, and the probe signal is transmitted back to the instrument through brush or capacitance coupling.
The traditional method is to install the probe group on the 12 o'clock position by the gantry saddle type, while the system installs the probe group on the lower 6 o'clock position, forming 100-l10 according to the minimum diameter of the symmetrical roller pair. When the angle support rotates, there is a minimum distance of 90-110 mm between the two 0250 mm symmetrical rollers. This distance can be placed in the bottom of the probe water tank, and the stability detection is carried out by the water rising method. Considering that the outer arc surface of stainless steel pipe is relatively clean and will not drop a lot of rust and oxide, the design of a small probe water tank at the lower 6 o'clock position is useful for operators to debug and replace the probe, reduce water pollution, reduce the blind zone at the end of the pipe, and improve the stability of the system operation. There are incomparable advantages.
2. The main components of the system
The main components of the ultrasonic testing system are shown in Figure 1, including feeding platform, feeding mechanism, steel tube positioning and rotation mechanism, moving car detection device, feeding mechanism and feeding platform, etc. The detection device is the core part of the detection line, including the ultrasonic flaw detector, probe, console, detection head (the mechanical device for installing probe, according to the detection mode, some include water tank), electromechanical control part, etc.
The steel pipe is conveyed to the positioning and rotating mechanism of the steel pipe through the feeding mechanism, and the active rollers of the rotating mechanism are driven by the motor to drive the steel pipe to rotate. The inspection trolley under the steel pipe feeds along the straight line of the guide rail. The ultrasonic signal enters the PC through the ultrasonic data acquisition card for flaw detection. The judgement result is sent to the PLC controller by the instruction. The flaw marker is controlled by the PLC to mark the position of the small flaw on the steel pipe.
2.1 Upper and lower feeding mechanism
Upper and lower materials are equipped with I sets of devices. When the first steel pipe is tested and discharged, the second steel pipe is discharged. The feeding and unloading device is driven by hydraulic cylinder, which works smoothly and reliably without impact noise. A wear-resistant block is arranged at the contact point between the bottom plate and the steel pipe, thereby greatly prolonging the service life of the bottom plate.
2.2 Pipe Positioning and Rotating Mechanism
The steel tube is positioned by several sets of rollers. The rollers are combined. The steel wheel is covered with rubber. The transmission is smooth and the friction is great.
The concentricity, straightness, speed, stability and vibration of the roller frame will affect the sensitivity and reliability of flaw detection. Therefore, the rotating mechanism is designed and processed around the requirements of sensitivity and reliability of flaw detection.
Because the specifications of the tested pipes vary greatly, in order to make the steel pipes of each specification form 100-11Oo angle support on the rollers, and the contact state with the rollers is the same when rotating, the center distance of the array of rollers can be adjusted by moving the passive rollers to meet the inspection requirements of the pipes of different specifications.
2.3 Motion Car Detection Device
The electrical coupling between the ultrasonic flaw detector and the probe caused by the rotation of the probe will have a great impact on the reliability of the flaw detection, which can be avoided by rotating the steel tube with a fixed probe. However, due to the bending of the steel tube, the change of the relative position between the forward probe and the rotating steel tube will cause the change of the incident angle. Therefore, a special probe servo device is designed to keep the relative position between the probe and the steel tube unchanged. The nose is composed of a wheel type combined probe, a floating tracking device and a support. The probe is equipped with detection oscillators in five directions, namely, detection thickness stratification, transverse clockwise, longitudinal, front and back. There are two channels in each direction. The pulse reflection method is used and the detection frequency is 2-6MHz. The probe is mounted on a floating tracking device controlled by pneumatics.
3 control system
According to the overall design requirements of the system, the technical requirements that the electrical control system should meet are as follows:
(1) The drive of the active roller in the roller frame is a DC motor, which adopts stepless speed regulation and is easy to debug.
(2) The flaw detection process is a simple open-loop program control system. The whole process of feeding, flaw detection, marking and blanking is controlled by the console automatically.
(3) The drive system is controlled by frequency conversion and programmable controller.
4-channel ultrasonic flaw detector
UD-MC8Y eight-channel A-mode ultrasonic pulse reflection flaw detector is used in the system. It has strong anti-interference ability, good stability and high detection sensitivity. Its main characteristics are as follows:
(1) The working sequence of eight independent channels can be edited at will.
(2) Each channel has three gates A, B and C, and C has the function of gate tracking.
(3) Each channel has two working modes: one receiving, one sending and two receiving and two sending.
The main technical specifications of the instrument are as follows: the maximum repetition frequency of a single channel can reach 6 kHz; the operating frequencies are 2.5, 5 and 10 MHz; the effective area of oscilloscope display (CRT) is 100 mm x 80 mm; and the effective area of liquid crystal display (LCD) is 103 mm. The scanning range is divided into 10, 50 and 250 mm three-gear, the maximum can be designed as 1000 mm; the horizontal linear error is less than 1%; the vertical linear error is less than 5%; the total attenuation of attenuator is 100 dB, the minimum resolution is ldB; and the dynamic range is ~28 dB.
5 Requirements for Steel Tubes
(1) The surface temperature of the steel tube during flaw detection is less than 80 C.
(2) The bending degree of steel tube is less than 2 m m/m and the bending degree of pipe end is less than 3.18 mm/1.5 M.
(3) Because the probe assembly is in contact with the steel pipe through wear-resistant contact boots, no sharp protuberances with a protruding surface of more than 10 mm, such as large fold, large crack VI on the surface of the pipe, etc., shall be allowed on the surface of the steel pipe. Otherwise, it will cause serious damage in the high-speed rotating body.
(4) Outer diameter deviation: +1.0%.
(5) The surface roughness Ra of steel tube is not more than 3.2.
Summary:
The automatic ultrasonic flaw detection machine for large-diameter seamless steel tube proposed in this paper can be installed offline as a single flaw detection production line. It can bear 160*2*4000-730*14*18000 mm and the ratio of wall thickness to outer diameter is not more than 0.22 in the transverse direction of seamless steel tube. The task of ultrasonic inspection of outer wall defect, thickness measurement and stratified defect is to complete the inspection of longitudinal and transverse internal and surface defect of steel pipe at one time (including upper and lower material conveying, marking, inspection record and report formation, etc.). It has the advantages of high sensitivity and good stability.
Non-destructive testing of seamless steel pipe is an important means to ensure product quality.
During the production of seamless steel tube, various defects may occur, which may affect the quality of steel tube. In order to ensure the safety of the products, the relevant state departments require the production enterprises to inspect seamless steel tubes in accordance with the product standards. Nondestructive testing mainly includes five methods: ultrasonic testing, ray testing, eddy current testing, magnetic particle testing and penetration testing. As an effective testing method, ultrasonic testing has been widely used in the field of seamless steel tube testing. Compared with other non-destructive testing methods, ultrasonic testing has many advantages, such as wide range of tested objects, large detection depth, accurate defect location, high detection sensitivity, low cost, good overwork performance, fast speed and harmless to human body.
It can be seen that ultrasonic nondestructive testing is a very important method in the field of nondestructive testing. It is of great significance to ensure the quality and reliability of seamless steel tube products.

1. Principle and method of detection
1.1 Detection Principle
In homogeneous materials, the existence of defects will cause discontinuity of materials. This discontinuity often results in inconsistency of acoustic impedance. Ultrasound will reflect at the interface of two kinds of media with different acoustic impedance. The reflected energy is related to the difference of acoustic impedance between the two sides of the interface and the quantity orientation and size of the interface. This is the principle of ultrasonic flaw detection.
1.2 mode of flaw detection
According to the movement mode of the tested steel pipe and the ultrasonic probe, there are two main types of automatic ultrasonic flaw detection equipment for seamless steel pipe in China: one is the device that the steel pipe spirally advances and the probe does not move; the other is the device that the steel pipe moves in a straight line and the probe rotates at a high speed. Whatever the movement mode, it is necessary to ensure that the whole section area of the steel pipe to be explored is scanned to be closed.
This system adopts the method of water immersion detection, the method of ultrasonic immersion focusing scanning to detect the longitudinal and transverse defects, wall thickness and layer defects of the inner and outer walls of O168-0730mm stainless seamless steel tube, and automatically detects the detected defects. Marking.
The probe assembly contacts the steel pipe through wear-resistant contact shoes. In this way, a rotating head is needed to fix each probe, and the probe signal is transmitted back to the instrument through brush or capacitance coupling.
The traditional method is to install the probe group on the 12 o'clock position by the gantry saddle type, while the system installs the probe group on the lower 6 o'clock position, forming 100-l10 according to the minimum diameter of the symmetrical roller pair. When the angle support rotates, there is a minimum distance of 90-110 mm between the two 0250 mm symmetrical rollers. This distance can be placed in the bottom of the probe water tank, and the stability detection is carried out by the water rising method. Considering that the outer arc surface of stainless steel pipe is relatively clean and will not drop a lot of rust and oxide, the design of a small probe water tank at the lower 6 o'clock position is useful for operators to debug and replace the probe, reduce water pollution, reduce the blind zone at the end of the pipe, and improve the stability of the system operation. There are incomparable advantages.
2. The main components of the system
The main components of the ultrasonic testing system are shown in Figure 1, including feeding platform, feeding mechanism, steel tube positioning and rotation mechanism, moving car detection device, feeding mechanism and feeding platform, etc. The detection device is the core part of the detection line, including the ultrasonic flaw detector, probe, console, detection head (the mechanical device for installing probe, according to the detection mode, some include water tank), electromechanical control part, etc.
The steel pipe is conveyed to the positioning and rotating mechanism of the steel pipe through the feeding mechanism, and the active rollers of the rotating mechanism are driven by the motor to drive the steel pipe to rotate. The inspection trolley under the steel pipe feeds along the straight line of the guide rail. The ultrasonic signal enters the PC through the ultrasonic data acquisition card for flaw detection. The judgement result is sent to the PLC controller by the instruction. The flaw marker is controlled by the PLC to mark the position of the small flaw on the steel pipe.
2.1 Upper and lower feeding mechanism
Upper and lower materials are equipped with I sets of devices. When the first steel pipe is tested and discharged, the second steel pipe is discharged. The feeding and unloading device is driven by hydraulic cylinder, which works smoothly and reliably without impact noise. A wear-resistant block is arranged at the contact point between the bottom plate and the steel pipe, thereby greatly prolonging the service life of the bottom plate.
2.2 Pipe Positioning and Rotating Mechanism
The steel tube is positioned by several sets of rollers. The rollers are combined. The steel wheel is covered with rubber. The transmission is smooth and the friction is great.
The concentricity, straightness, speed, stability and vibration of the roller frame will affect the sensitivity and reliability of flaw detection. Therefore, the rotating mechanism is designed and processed around the requirements of sensitivity and reliability of flaw detection.
Because the specifications of the tested pipes vary greatly, in order to make the steel pipes of each specification form 100-11Oo angle support on the rollers, and the contact state with the rollers is the same when rotating, the center distance of the array of rollers can be adjusted by moving the passive rollers to meet the inspection requirements of the pipes of different specifications.
2.3 Motion Car Detection Device
The electrical coupling between the ultrasonic flaw detector and the probe caused by the rotation of the probe will have a great impact on the reliability of the flaw detection, which can be avoided by rotating the steel tube with a fixed probe. However, due to the bending of the steel tube, the change of the relative position between the forward probe and the rotating steel tube will cause the change of the incident angle. Therefore, a special probe servo device is designed to keep the relative position between the probe and the steel tube unchanged. The nose is composed of a wheel type combined probe, a floating tracking device and a support. The probe is equipped with detection oscillators in five directions, namely, detection thickness stratification, transverse clockwise, longitudinal, front and back. There are two channels in each direction. The pulse reflection method is used and the detection frequency is 2-6MHz. The probe is mounted on a floating tracking device controlled by pneumatics.
3 control system
According to the overall design requirements of the system, the technical requirements that the electrical control system should meet are as follows:
(1) The drive of the active roller in the roller frame is a DC motor, which adopts stepless speed regulation and is easy to debug.
(2) The flaw detection process is a simple open-loop program control system. The whole process of feeding, flaw detection, marking and blanking is controlled by the console automatically.
(3) The drive system is controlled by frequency conversion and programmable controller.
4-channel ultrasonic flaw detector
UD-MC8Y eight-channel A-mode ultrasonic pulse reflection flaw detector is used in the system. It has strong anti-interference ability, good stability and high detection sensitivity. Its main characteristics are as follows:
(1) The working sequence of eight independent channels can be edited at will.
(2) Each channel has three gates A, B and C, and C has the function of gate tracking.
(3) Each channel has two working modes: one receiving, one sending and two receiving and two sending.
The main technical specifications of the instrument are as follows: the maximum repetition frequency of a single channel can reach 6 kHz; the operating frequencies are 2.5, 5 and 10 MHz; the effective area of oscilloscope display (CRT) is 100 mm x 80 mm; and the effective area of liquid crystal display (LCD) is 103 mm. The scanning range is divided into 10, 50 and 250 mm three-gear, the maximum can be designed as 1000 mm; the horizontal linear error is less than 1%; the vertical linear error is less than 5%; the total attenuation of attenuator is 100 dB, the minimum resolution is ldB; and the dynamic range is ~28 dB.
5 Requirements for Steel Tubes
(1) The surface temperature of the steel tube during flaw detection is less than 80 C.
(2) The bending degree of steel tube is less than 2 m m/m and the bending degree of pipe end is less than 3.18 mm/1.5 M.
(3) Because the probe assembly is in contact with the steel pipe through wear-resistant contact boots, no sharp protuberances with a protruding surface of more than 10 mm, such as large fold, large crack VI on the surface of the pipe, etc., shall be allowed on the surface of the steel pipe. Otherwise, it will cause serious damage in the high-speed rotating body.
(4) Outer diameter deviation: +1.0%.
(5) The surface roughness Ra of steel tube is not more than 3.2.
Summary:
The automatic ultrasonic flaw detection machine for large-diameter seamless steel tube proposed in this paper can be installed offline as a single flaw detection production line. It can bear 160*2*4000-730*14*18000 mm and the ratio of wall thickness to outer diameter is not more than 0.22 in the transverse direction of seamless steel tube. The task of ultrasonic inspection of outer wall defect, thickness measurement and stratified defect is to complete the inspection of longitudinal and transverse internal and surface defect of steel pipe at one time (including upper and lower material conveying, marking, inspection record and report formation, etc.). It has the advantages of high sensitivity and good stability.

