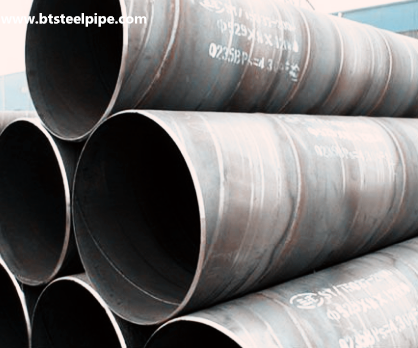
ASTM A381 Y52 Metal-Arc-Welded Steel Pipe
ASTM A381 Y52 Metal-Arc-Welded Steel Pipe Standard:ASTM A381 Standard Specification for Metal-Arc-Welded Steel Pipe for Use With High-Pressure Transmission Systems ASTM A381 Y52 Metal-Arc-Welded Steel Pipe are intended for fabrication of fi
ASTM A381 Y52 Metal-Arc-Welded Steel Pipe
ASTM A381 Y52 Metal-Arc-Welded Steel Pipe
Standard Specification for
Metal-Arc-Welded Steel Pipe for Use With High-Pressure Transmission Systems
ASTM A381 Y52 Metal-Arc-Welded Steel Pipe are intended for fabrication of fittings and accessories for compressor or pump-station piping.
ASTM A381 Y52 Metal-Arc-Welded Steel Pipe covers straight seam, double-submerged-arc-welded steel pipe suitable for high-pressure service, 16 in. (406 mm) and larger in outside diameter, with wall thicknesses from 5 ⁄ 16 to 1 1 ⁄ 2 in. (7.9 to 38mm).
ASTM A381 Y52 Metal-Arc-Welded Steel Pipe Quick Details
Company Name: Beite steel pipe
Country/Region: China
Product Name:ASTM A381 Y52 Metal-Arc-Welded Steel Pipe
Manufacture:Metal-Arc-Welded .
Outside Diameter:406-1011mm
Wall thickness:7.9mm——38mm
Length:6000mm、12000m or specified length as require
Port of Shipment:Tianjin,China
Payment:L/C or T/T
Delivery: 7-15 days after payment
Package: Bundles (hexagonal),Wooden Boxes,Crates (steel/wooden)
Materials and Manufacture
The steel plate used in the manufacture of the pipe shall be of suitable welding quality carbon steel
Heat Treatment:
All pipe, after welding, ASTM A381 Y52 Metal-Arc-Welded Steel Pipes are heat treated at a temperature of 1100°F (593°C) or higher.
When specified in the purchase order, all pipe after welding shall be heated at 1650 to 1750°F (899 to 954°C) and air cooled.
Chemical Composition
| Element | Composition, %, max | |
| Ladle | Check | |
| Carbon | 0.26 | 0.30 |
| Manganese | 1.40 | 1.50 |
| Phosphorus | 0.025 | 0.030 |
| Sulfur | 0.025 | 0.025 |
Mechanical Properties
| Class |
Yield Strength, min, psi (MPa) |
Tensile Strength, min, psi (MPa) |
Elongation in 2 in. (50.8 mm),min, % |
| Y 52 | 52 000 (360) | 66 000 (455) | 20 |
Mechanical Tests
Transverse Body Tension Test
Transverse Weld Tension Test
Transverse Guided-Bend Weld Test
Hydrostatic Test
Radiographic Examination
We will employ radiography as a production control on the welding employed in the manufacture of pipe to this specification.
Permissible Variations in Dimensions
Outside Diameter—60.5 % of the specified outside diameter for the outside diameter based on circumferential measurement, except that in sizes 24 in. (610 mm) and smaller this tolerance shall be 6 1 ⁄ 8 in. (3.2 mm).
Out-of-Roundness—1 %, that is, the difference between the major and minor outside diameter.
Thickness—The minimum wall thickness shall not be more than 0.01 in. (0.25 mm) under the specified thickness. Localized (isolated and noncontinuous) reductions in wall thickness caused by noninjurious surface defects may be permitted up to a depth not exceeding 6 1 ⁄ 2 % the specified pipe wall thickness.
Ends
The width of the end is 1 ⁄ 16 in. (1.6 mm) with a tolerance of 6 1 ⁄ 32 in. (0.8 mm).
The end of the pipe is not be out of square more than 1 ⁄ 16 in. (1.6 mm).
Ordering Information
1 Orders for material include the following, as required, to describe the desired material adequately:
1.1 Quantity (feet, centimetres, or number of lengths),
1.2 Name of material (metal-arc welded pipe),
1.3 Class (Y52),
1.4 Material (carbon or alloy steel),
1.5 Size (outside diameter and wall thickness),
1.6 Length (specific or random) ,
1.7 Ends ,
1.8 Heat treatment (stress-relieved or normalized) ,
1.9 Specification number, and
1.10 Special requirements or exceptions to this specification.
Product key description, this is a very good product description, detailing our product use, product characteristics

